Showing posts with label crafts. Show all posts

26 July 2015

Stitch-Up: Skill Share Workshop


A couple of weekends ago, Stitch Up gave me the opportunity to practise teaching craft by getting a set of sewing machines, materials and tools funded by Greeniversity Skills Share! I got to TEACH A SEWING CLASS, how awesome is that?! This first one was with a little bit of a test run with friendly faces, but I can still hardly believe how much I loved it. 

I learnt to sew from my mum, the internet and a load of practise, and it felt amazing to be able to pass the skills I have learnt onto someone who has never sewn before, or who was a little rusty. We are planning to run a bunch of introductory workshops, as well as a few more in-depth classes to get peopled hooked on sewing, so it was super useful (and fun) to see how this first one ran.


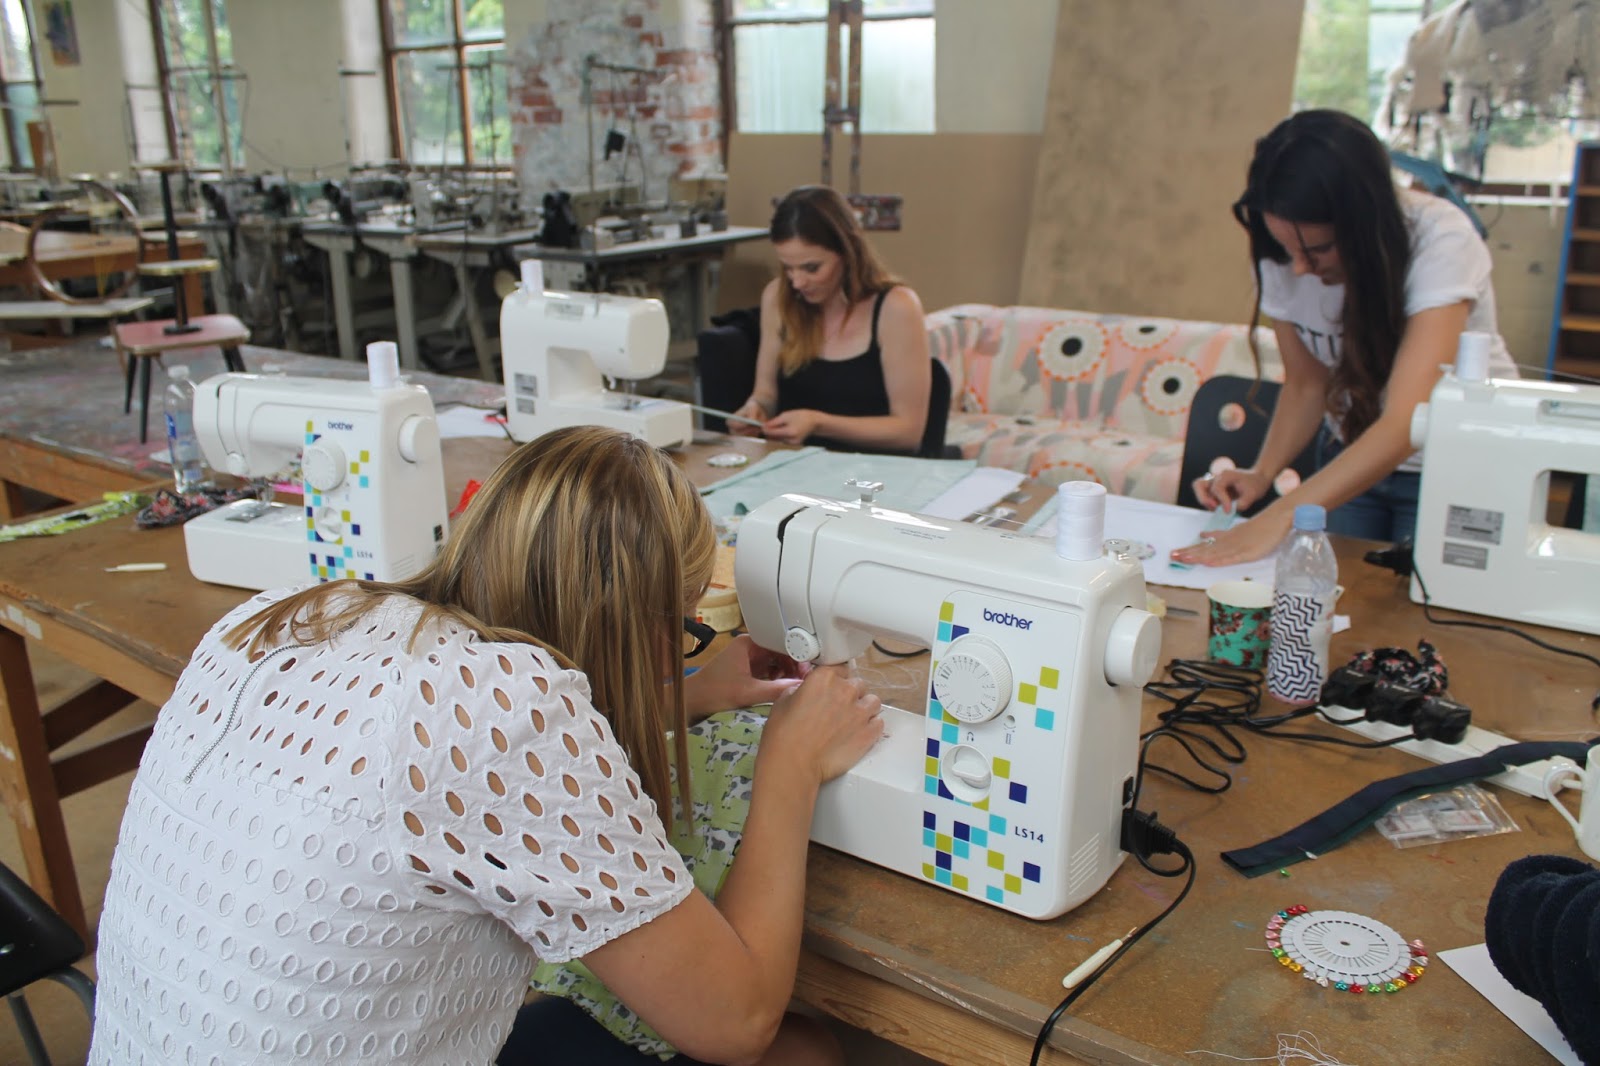
We ran this class in the incredible Stitch-Ups studio, which is such an awesome space and perfect for sewing. We went through some basic machine control, what stitches work for what and once everyone felt comfortable at their machines, we went onto sewing a lined tote-bag. I picked this as the introductory make because it covers so many techniques; backstitch, sew straight, turn corners, hem, box corners and top stitching. And, the final thing looks awesome and is something people can actually use and feel proud of.

It was kind of daunting being the one in charge of a class like this. A couple of the machines jammed a few times but I managed to work out the problem and get it sewing smoothly again, which was a huge relief. The best part through? Seeing how happy everyone was with what they had made! Everyone was so pleased with that they had made (they did look awesome!!). The pattern we used was sewn inside-out then flipped the right-way right at the end so when the final step came around and everyone could finally see what their bag was going to look like, it felt amazing. Everyone did so well, no major mistakes at all and they all looked incredible in the end. Thanks guys, you did SOOOO good.

So, if you're in Leeds or the surrounding area, give Stitch Up a follow: on twitter, facebook and instagram. We will be putting some dates out pretty soon, it would be awesome to see you!!

______________________

3 August 2013

Some Birthday Decorations.


I love making my own decorations. I like to use things we have around the house. This Monday it is Dixons birthday, so I took the chance over the weekend to put up a few pieces ready to celebrate. I used fabric scraps and magazine cuttings. Nice and simple. (And yes, yes I did spell 'Birthday' incorrectly. Totally meant to...)


_________________

27 March 2013

DIY Scrap-Work Cloud


I don't know about anyone else, but I just can't bring myself to throw away any fabric scraps I have. Those patterns are just too pretty to bin! I made a bag to hang on my craft room wall especially for scraps. And holy hell is it getting full!! I decided I needed to make something to make the most of those amazing designs.

I have a few ideas waiting for another snowy day. I made a patchwork cloud by hand a while ago. It's hung in our room every since! I love it. So decided it was perfect for this mini-project, this time on my machine! Here is how you can make your own;

You'll need:
     - Scraps! Any size, colour or pattern.
     - Material for your back (I used an old tshirt)
     - Iron
     - Soft Pencil
     - Stuffing
     - Sewing machine // or thread if you're doing it by hand


How to:

     - Cut your scraps down into rectangles or squares. Size is up to you, just avoid curves.
     - Play around with your material arrangement until you're happy with the colour and pattern balance. Pin it into rows!
     - Sew each piece on each row together, iron your seam allowance down. Now pin each row together.
     - Sew your rows together! Iron again so its all neat and flat.
     - Grab your tshirt, or whatever material you're using for your backing, and mark out how big your scrap front is. Inside this outline sketch out your cloud shape. This took me ages because I'm majorly indecisive.
     - Cut out your shape then pin your two pieces together. Inside out remember, so have both raw sides facing out. Sew around the whole cloud outline, leaving a 2-3" gap unstitched so you can turn the whole thing the right way around, turn it the right way. Use this gap for stuffing too!
      - Once you're stuffed and plumped out sew up the last gap by hand. Stitch in a hoop to hang it. Attach little bead for raindrops if you like. Hang, and admire!

____________

I think a collection of these would be super cute in a nursery window or above any bed! I love them. I'm thinking of making a huge one. What do you think? Is there anything you use your scraps for?
 
Lifestyle Blog // Nature, DIY, Coffee // By The Lock Lifestyle Blog // Nature, DIY and Coffee // By The Lock